Does this lens have a glow? The Fujifilm XF35mm F1.4

Recently I photographed my teenage daughter Colbie to help build her modelling portfolio. I organised with one of my clients the use of their lovely business interior and coordinated with my girl a simple colour palette to compliment the environment we would use for the imagery.

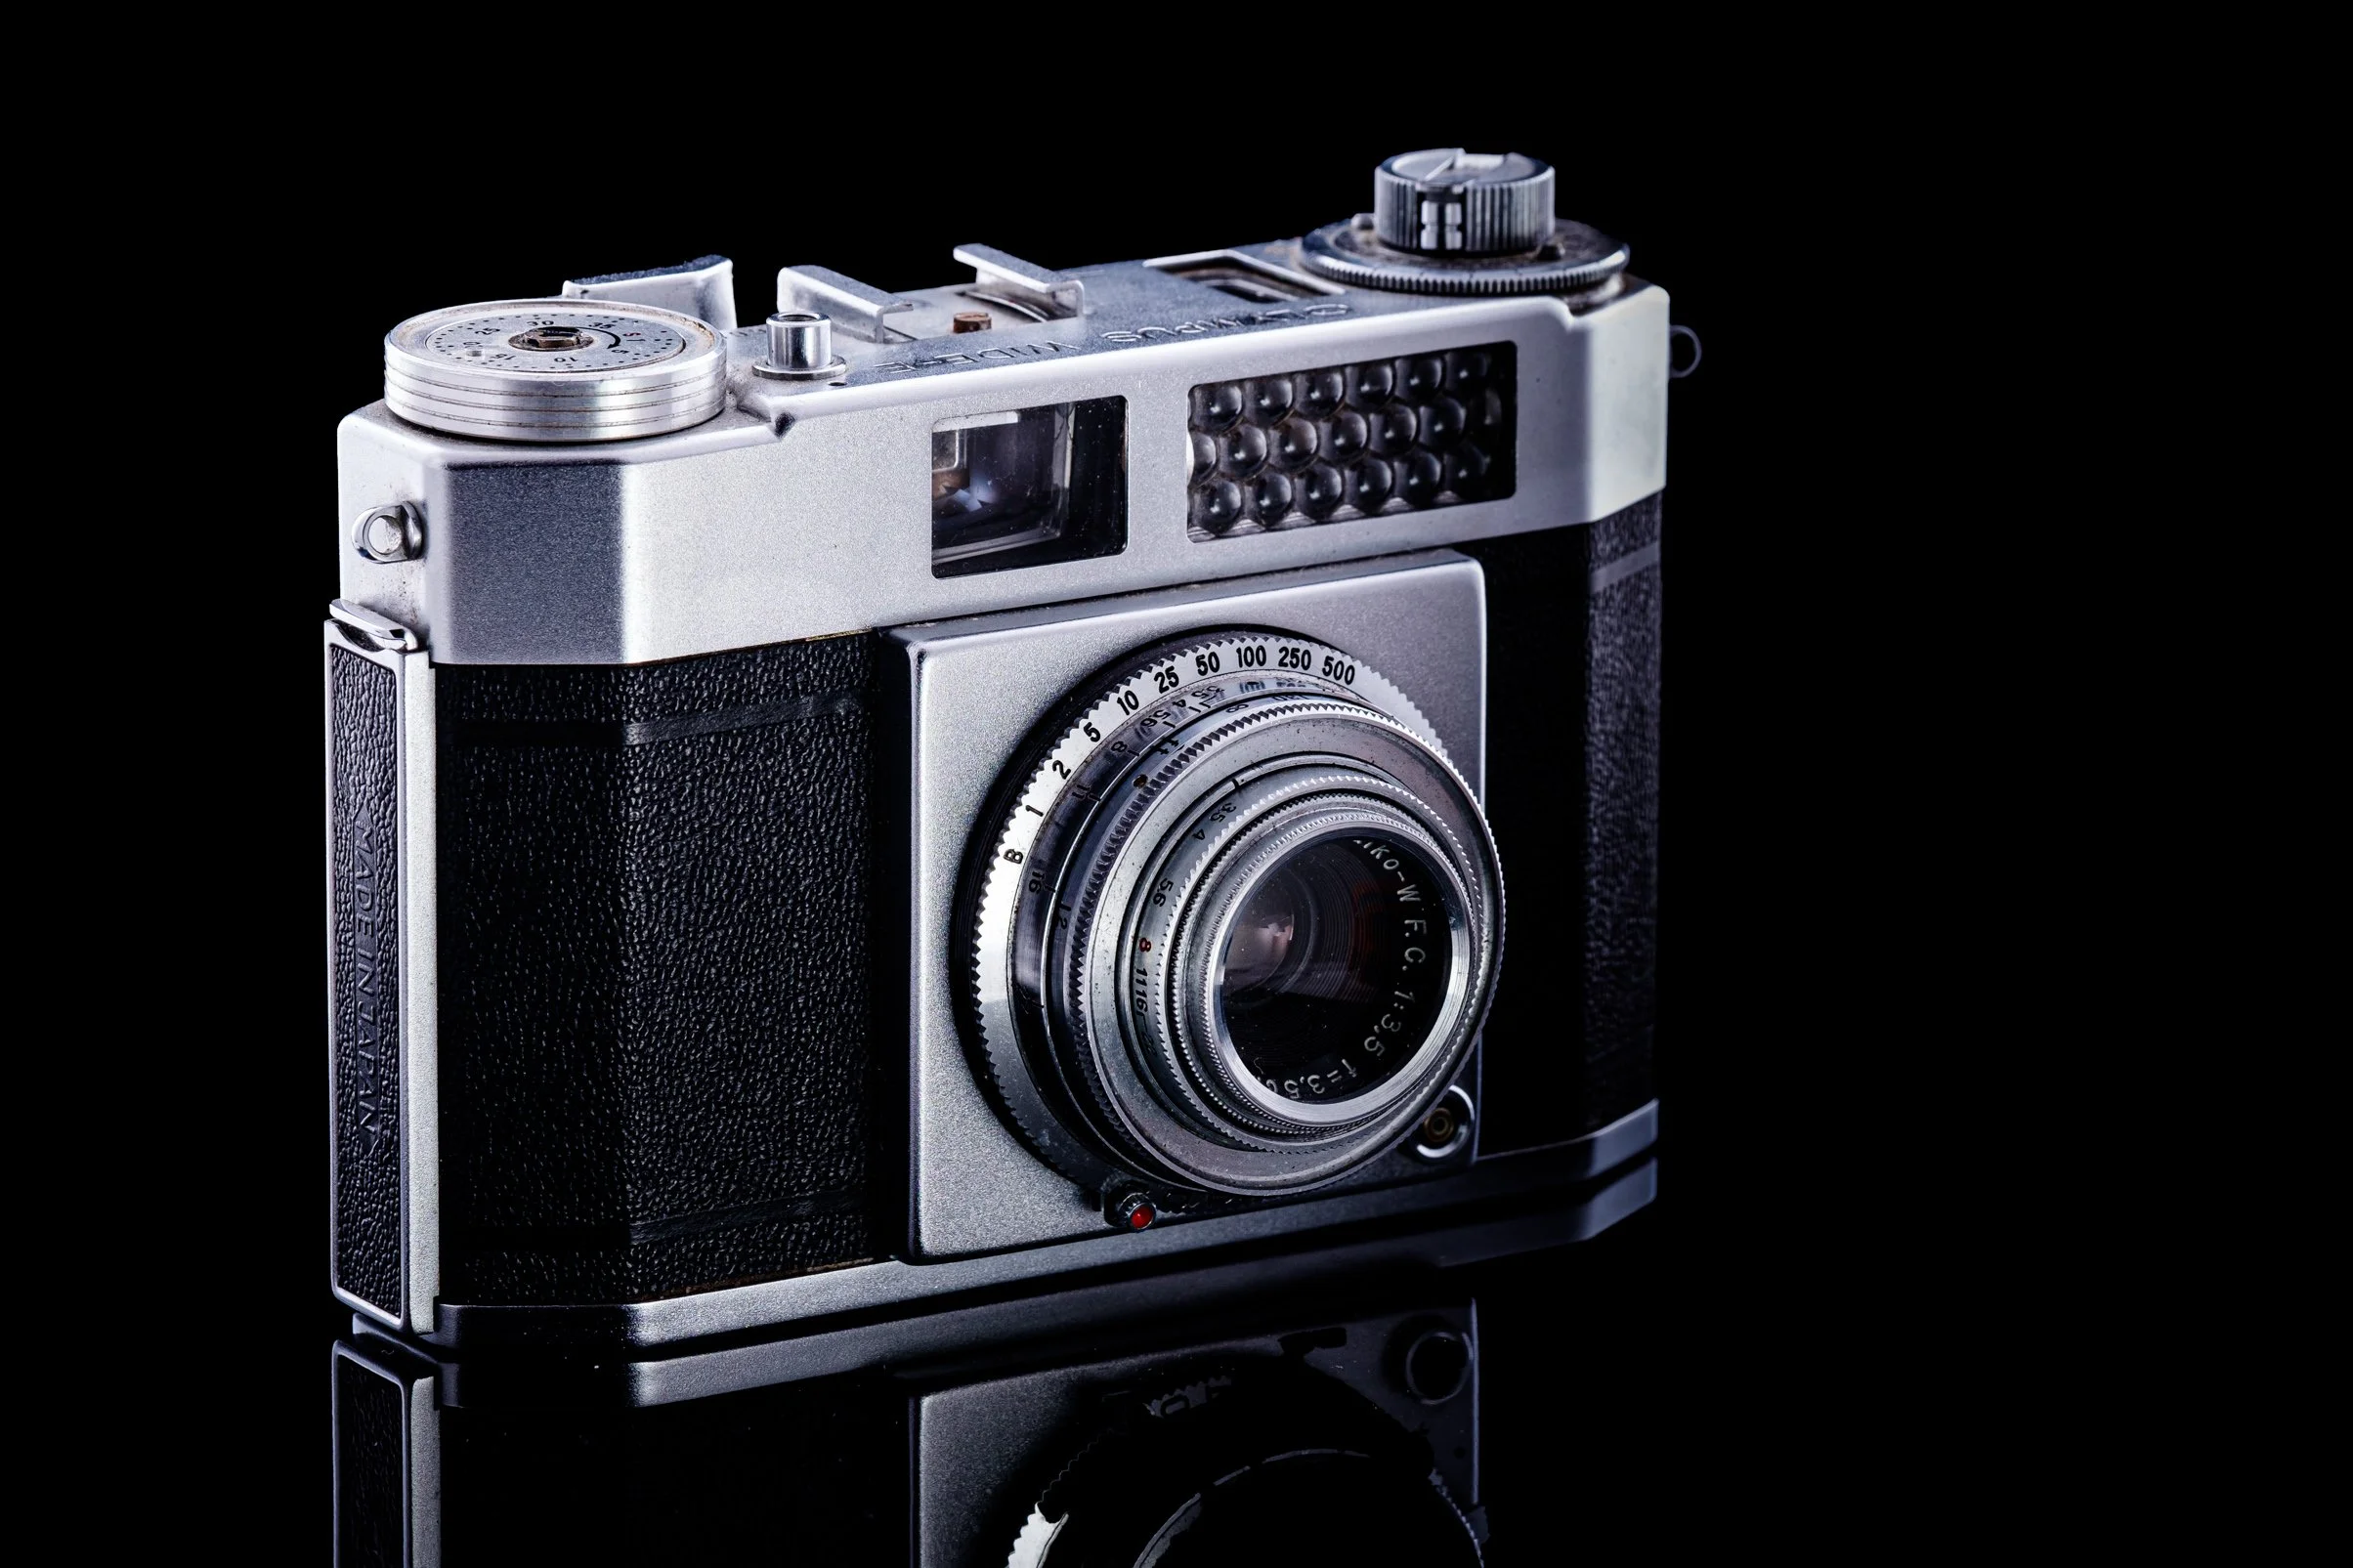
I use both Fujifilm GFX and the Fujifilm X systems, but decided to roll with the X system and a combination of the XF 35mm 1.4 and XF 50 - 140mm 2.8 lenses.

The first scene we worked used a fabulous hanging chair for Colbie to lounge in. I used the XF 35mm here at f1.8 as the chair was ever so slightly rocking and wanted a faster shutter speed to keep subject sharpness.

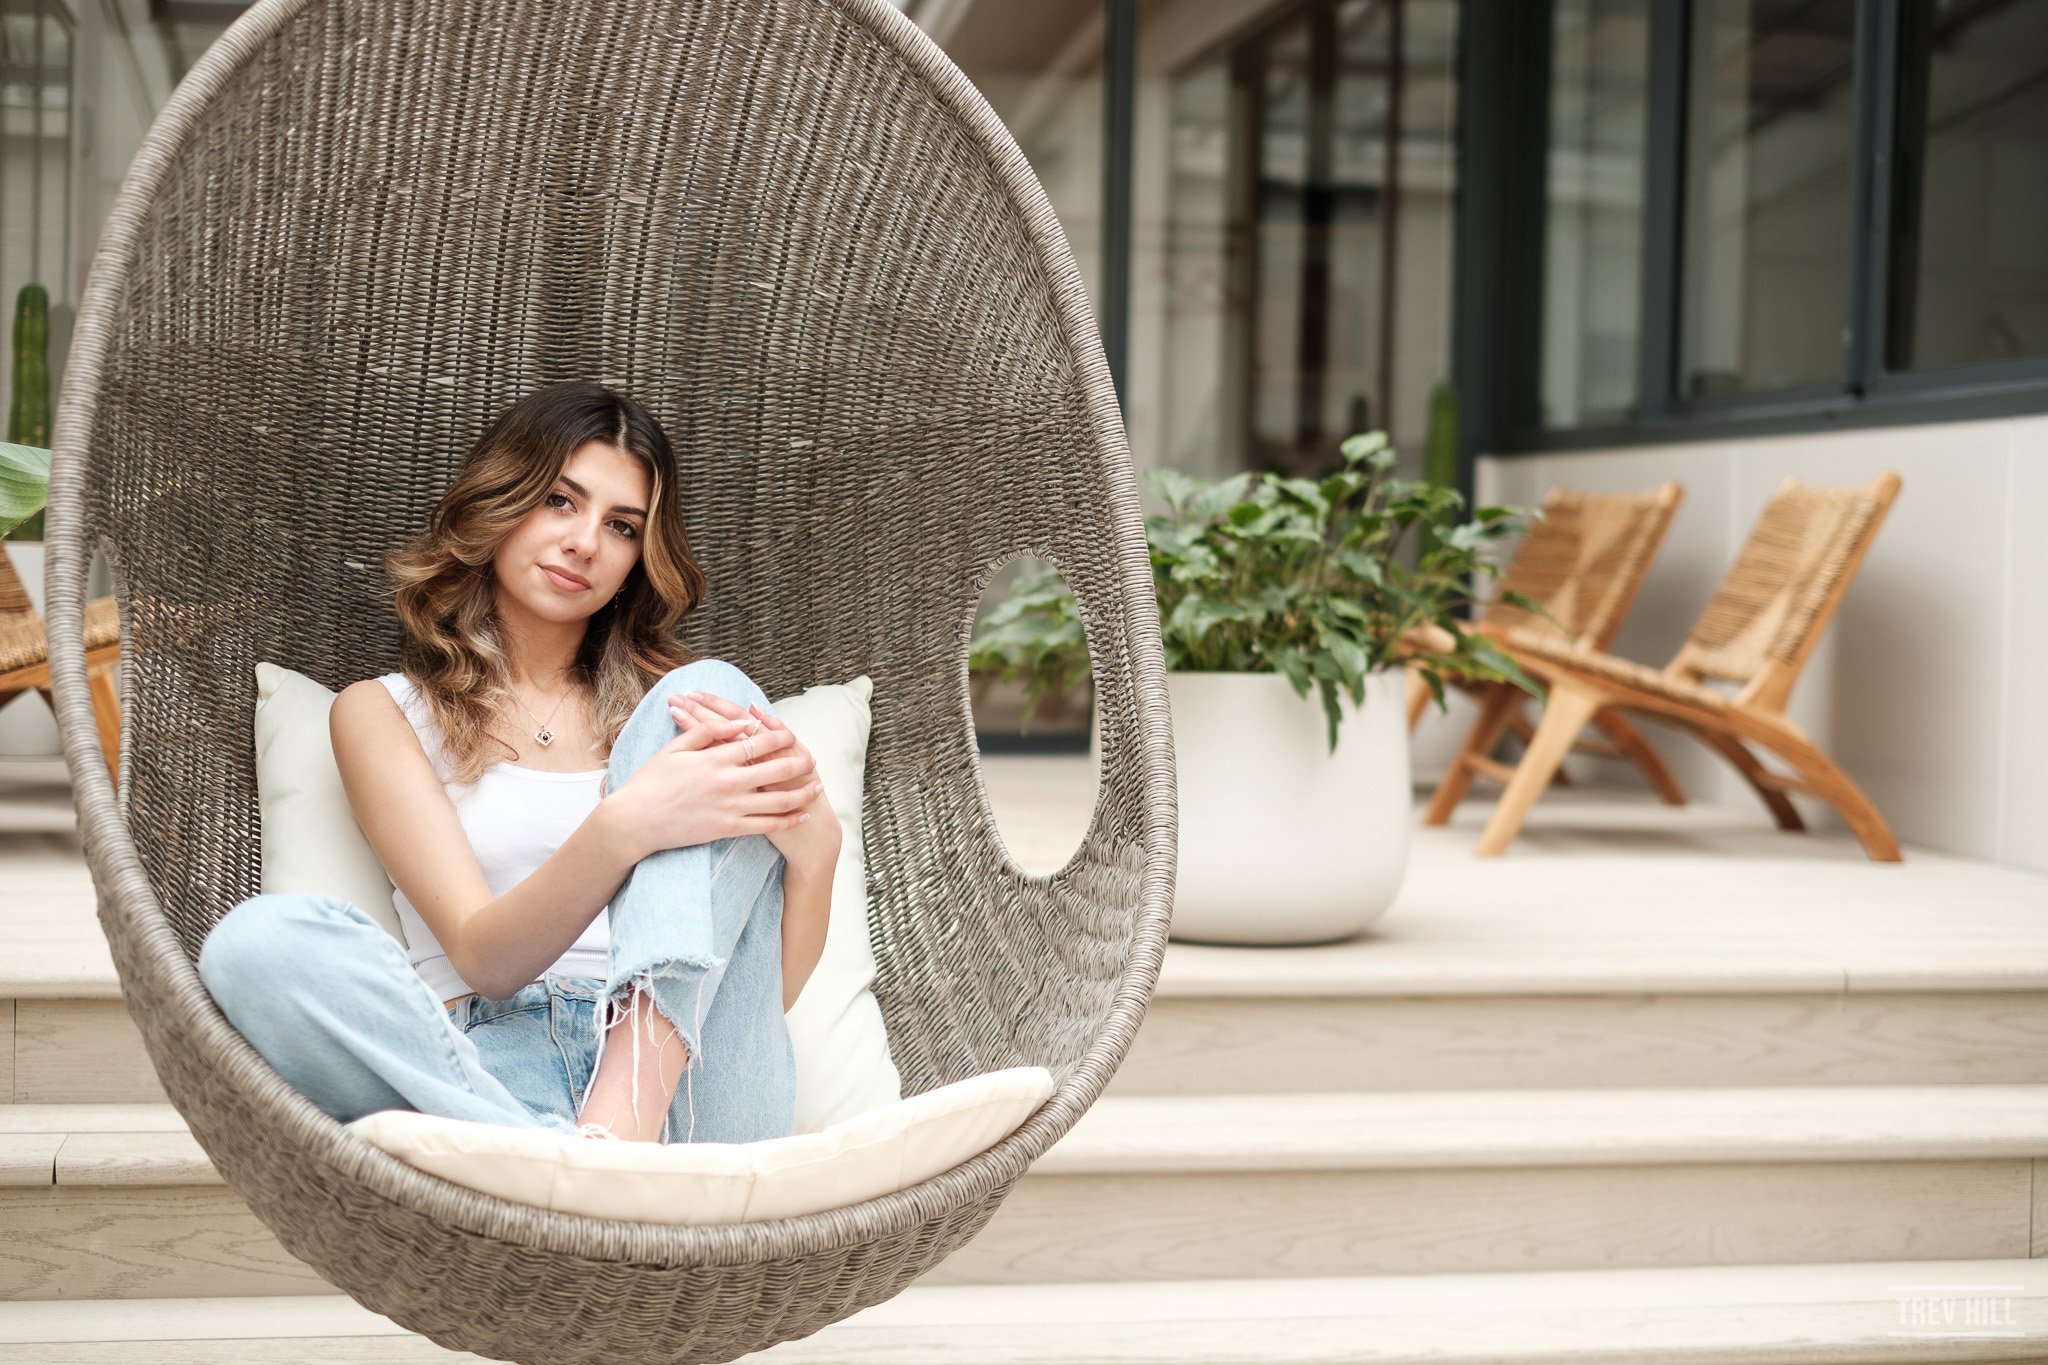
Fujifilm XF 35mm 1.4 @ f1.8, Classic Chrome.

So I’m looking at these images on the back of my camera and thinking this looks really nice, but right at this moment I wasn’t thinking about any special ‘glow’ quality. The next scene within the space was the back wall with a georgeous reclining couch, lovely palm pot plant, and coffee table stump. Colbie did a great job with her pose, and the images on the back of the camera looked fab to me, but I still wasn’t getting a ‘glow’ vibe.

Fufifilm XF 35mm 1.4 @ f2, Classic Chrome.

The next shot is based on a yoga pose, and out of habit I had the 35mm at f2, as that’s where I usually set the aperture, again not really thinking of any special glow exhibited by the image here, as this is more of a pulled back environmental image.

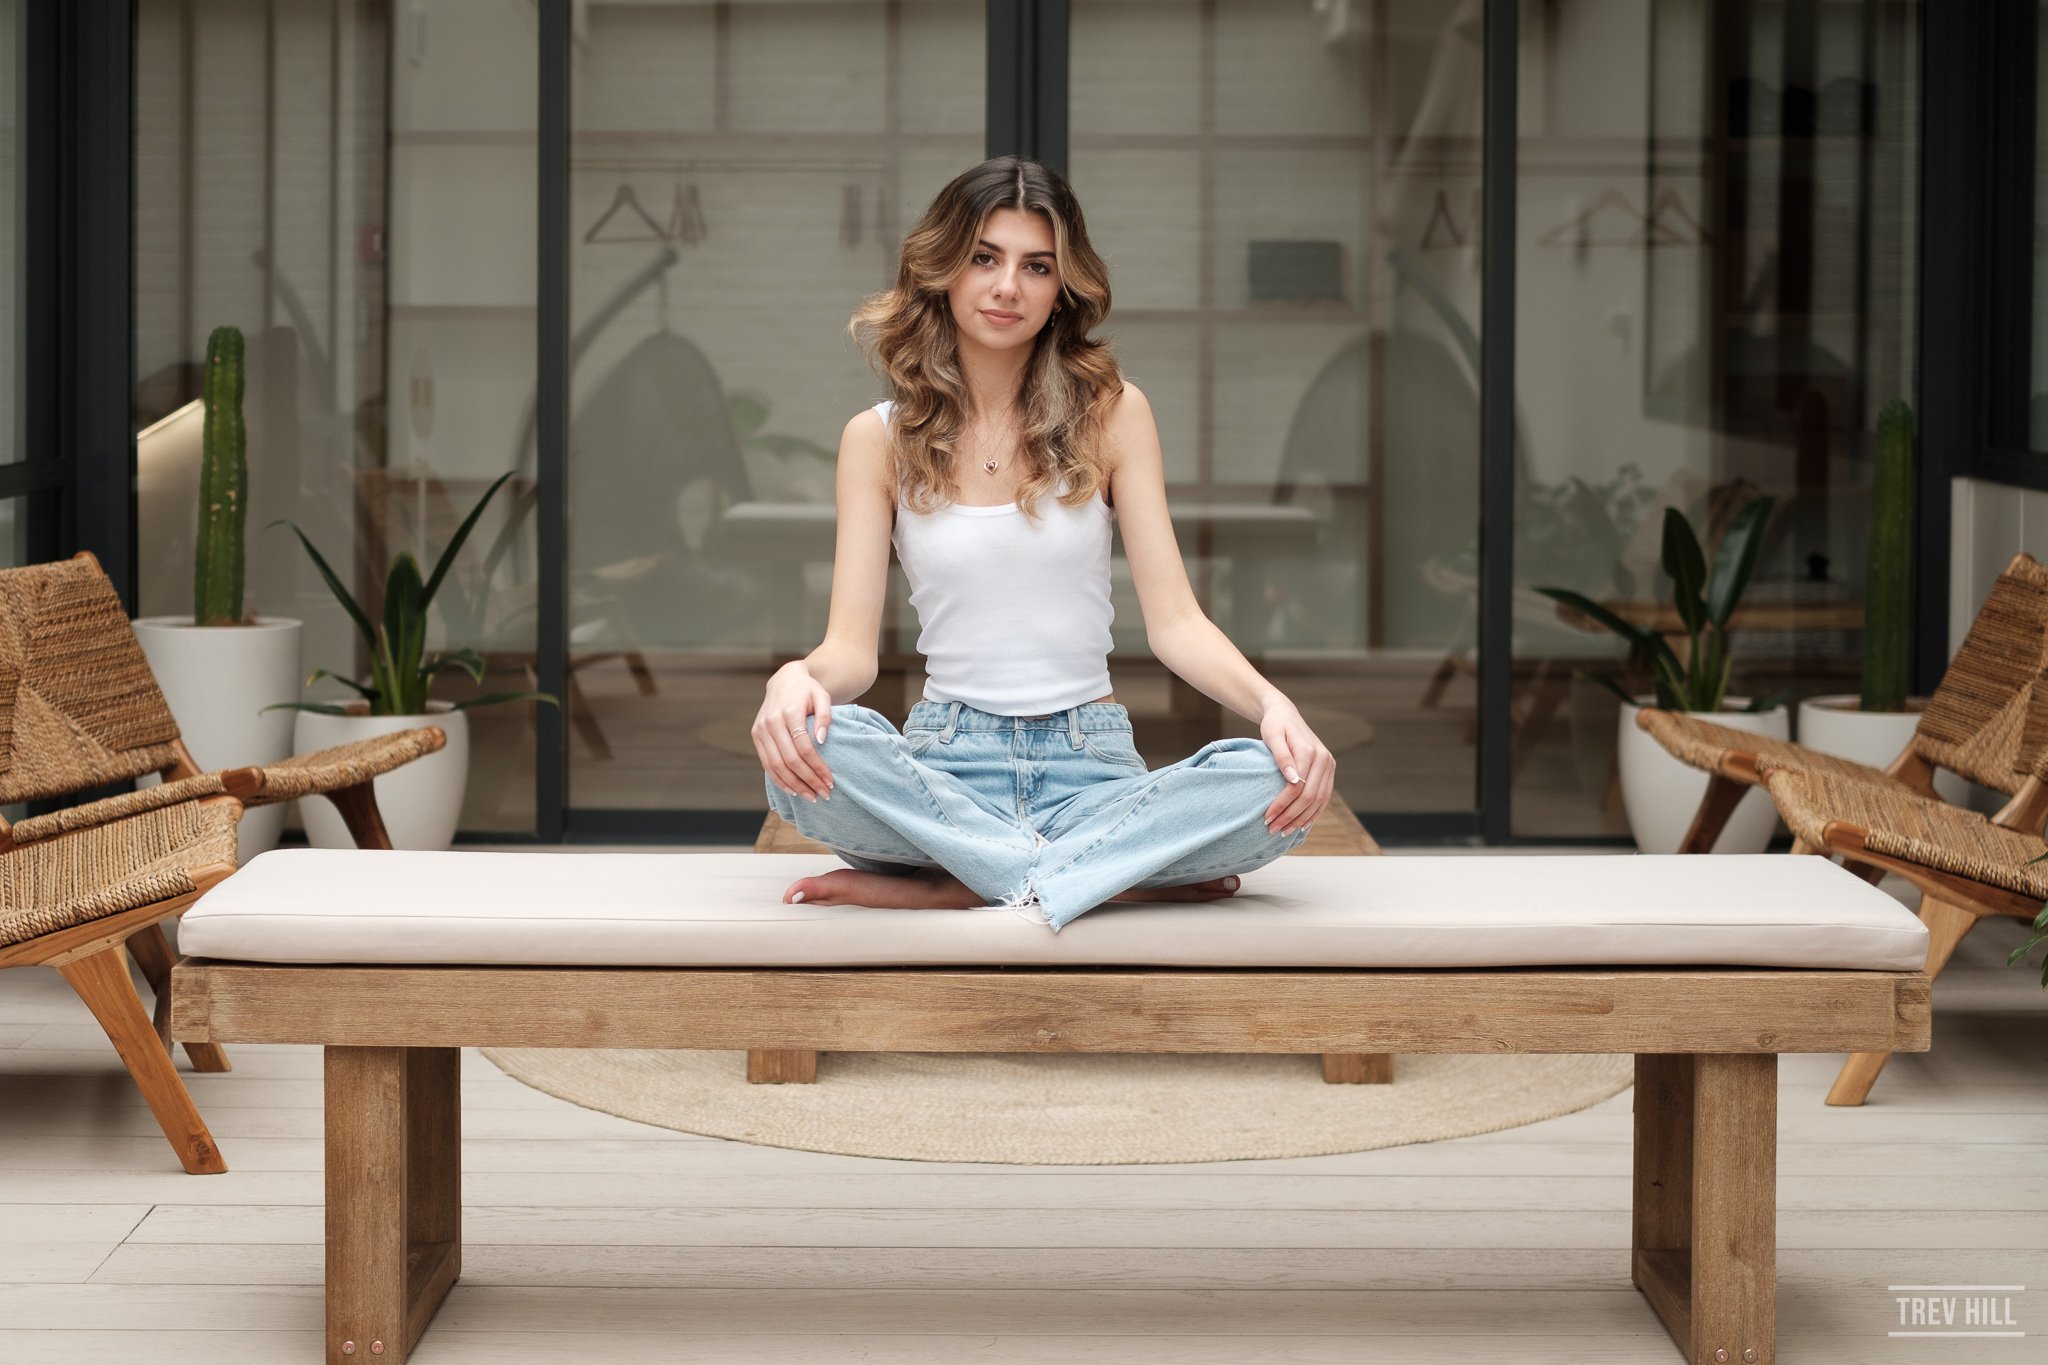
Fujifilm XF 35mm 1.4 @ f2. Classic Chrome.

But then as I took more tightly cropped images, here is where I started to notice a lovely softness to my daughters skin, dare I say it, a hint of a glow. The first image is in Classic Chrome, so a little desaturated, but in the following 2 images I used the ProNeg-Hi simulation and the warmer skin tones I think exude a bit of a glow.

Fujifilm XF 35mm 1.4 @ f1.8

Fujifilm XF 35mm 1.4 @ f1.8, Pro-Neg Hi

Fujifilm XF 35mm 1.4 @ f2, Pro-Neg Hi

So right about now, you are either agreeing with me or laughing at me, as you can or can’t see a glow… You know what, you might be right and I might just be fooling myself. However, let’s finish off the shoot.

Next I stood Colbie up and took out the XF 50-140mm f2.8. Shooting wide open I took a series of images, again they look great, but looking at them now, I don’t think they have the same ‘glow.’

Fujifilm XF 50-140mm, @ f2.8, Classic Chrome

Fujifilm XF 50-140mm @f2.8, Classic Chrome

Back with the 35mm on the camera I took some waist high up shots, but from this sort of distance I didn’t really see anything other than good natural light on my subject.

Fujifilm XF 35mm 1.4 @ f1.8, Classic Chrome

In the next image I threw back on the XF 50-140mm and now looking at this image of my daughter, am I seeing a glow on the XF 50-140mm lens? Maybe it’s just the lovely natural light we are using. Now I’m confused, everything is starting to glow.

Fujifilm XF 50-140mm f2.8 @3.2, Classic Chrome

This time we moved locations to a space right next to this room, it allowed all the natural light from this space to filter in from a large side window above. Using the XF 35mm I utilised the lovely couch for a picture with Colbie.

Fujifilm XF 35mm 1.4 @ f2, Classic Chrome

Fujifilm XF 50-140mm @ f2.8, Classic Chrome

One last photo above using the XF 50-140mm. I look back on these images and are completely undecided on whether I am just seeing things or there is really a glow to this lens, either way, the Fujifilm XF 35mm 1.4 is a gem for stationery subject photography, and will always have a place in my tool bag.

Photographer: Trev Hil - Model: Colbie Hil. - Location: Well + Being, Dunedin.

Infrared Photography - Wingatui Railway Station

I remember thinking how beautiful Wingatui railway station was the first time I saw it, and also, how hard it was to photograph. No matter how I tried, I couldn’t take a photo I thought did it justice. One of the issues I had was the station had been repaired and painted in recent times but the repair job paint colour didn’t match up with the old, so it made it a nightmare for colour photography. It wasn’t until I started including black and white infrared photography into my landscape workflow that I finally found a way to take pictures of the station that excited me.

Wingatui Railway Station, Mosgiel, New Zealand.

My first approach was to shoot toward the station with the sun over my back. With infrared, this does result in deeper blacks on blue skies and punchy contrast.

Wingatui Railway Station, Mosgiel, New Zealand.

The images were okay but as the image above illustrates, I found the the backdrop to the station lacking depth and it was also unbalanced with the station having a massive tree behind it on the right and then nothing to the left.

Wingatui Railway Station, Mosgiel, New Zealand.

In the image above, the railway track winds off into the bush. Black and white infrared can be extremely hard to decipher unless you have structured elements cutting through the chaos and communicating what we should look at. In the image above the man made elements of the railway track and gravel mound give us a sense of place.

Wingatui Railway Station, Mosgiel, New Zealand.

In the image above by shooting from this side of the station there are only a few elements to focus on, and I find simple images so much nicer to look at.

I was delighted to find this old underpass (pictured below) and thought it would make a great shoot location for some fashion photography with strobes or even an edgy family portrait shoot as the station area itself could be great for pictures. Get in touch if you are keen.

Wingatui Railway Station underpass, Mosgiel, New Zealand.

The next 3 images were all about finding the right angle to show off the station from the south side. When I took the first image I knew immediately this was the composition I liked most. It’s crazy how an infrared camera renders foliage as white. In this scene you would think this is a snow storm in winter, but no, this is a hot and foggy day in summer. It just blows my mind.

Wingatui Railway Station, Mosgiel, New Zealand.

I love the black to white ratio in this image above, with the foreground providing a nice pathway to the subject of the station.

Wingatui Railway Station, Mosgiel, New Zealand.

A square on view. I like this as well as it includes the old fashioned power poles, giving the image balance.

Wingatui Railway Station, Mosgiel, New Zealand.

This image above of Wingatui Station was my personal pick of the bunch. For me there is a great balance of white and black with strong lines, a simple subject and an interesting, textured but unobtrusive background. This is an image I will happily pop up on my print shop, but to be honest I liked all three of the final images. Thanks for stopping by.

Infrared photography - Creating a body of work.

When I started out with infrared photography a few months ago I had no idea where my journey would take me. Initially I though infrared would be about capturing landscape, but that changed when I started photographing the buildings and manmade elements of Dunedin city.

The image that made me sit up and go ‘wow, I love how this looks’ was of the clock tower at Otago University. Heritage buildings render beautifully in infrared. There is almost a vintage and gothic vibe imparted by the glow of the foliage and grass in each scene. In Dunedin we have a nice selection of heritage buildings, so I intend to keep returning to them all, as I know each visit will give me a different result. I am not 100% happy with some of the images in the set below, but you can clearly see where I am heading with my infrared work. It will be great when a few key buildings are uncovered from scaffolding, hopefully they will have some extra pop for photos.

Otago University Clock Tower, Dunedin.

East Taieri Church, Mosgiel.

Otago Museum, Dunedin.

St Pauls Cathedral, The Octagon, Dunedin.

Lake Waihola, Dunedin. Early morning mist hangs over the lake.

Wingatui Railway Station, Dunedin. An image from a set I wrote another blog on.

St Joesephs Cathedral, Dunedin.

Historic Henley Cheese Factory, Dunedin.

The Oval, Dunedin.

Greenpoint Shipwreck Yard, Bluff.

Mausoleum of William Larnach, North Cemetery.

Lookout Point Fire Station, Dunedin.

Victorian Water House - Ross Creek Resevoir, Dunedin

Cargill’s Castle, Dunedin.

First Church, Dunedin.

Second Beach - Stormwater outlet (1904), Dunedin.

Chingford Park, a closer view. I’m not completely happy with the framing but this shot has great potential, if I can get a windless day, and would also make a nice colour image in Autumn.

A closer view of Otago Boys High School.

Robbie Burns Statue, The Octagon, Dunedin.

Learning Infrared Black and White Photography

Introduction

I was watching Youtube a few months ago when I stumbled onto a vlog about black and white infrared photography. It was a revelation. Photography in full sunshine, in the middle of the day, with stunning results. It sounded like madness but the results I was seeing were stunning. After diving into a rabbit hole on the internet about infrared, I started to think about how infrared would benefit my photography.

  1. Hiking during the day in harsh light isn’t usually an opportunity for photography, now with infrared those conditions are perfect. My quest to document New Zealand’s stunning great walks could be enhanced by bringing both a normal and infrared camera body on trips, carrying one set of lenses for both.

  2. Black and white photography is a non-event in my landscape portfolio and shop. Documenting images in mono could bring a new customer to my online store. www.trevhillshop.nz

  3. Reshooting my favourite honeypot spots around Otago completely reinvigorates my landscape photography.

  4. Getting outdoors in summer is healthy and good exercise for the mind and body.

Camera Conversion or buy a filter?

The quick and fast solution to starting in infrared photography is to buy a simple screw on filter for the front of your lens. The big disadvantage you have with this method is the filter acts like a 10 stop ND and long exposures are needed to get a decent exposure. The main attraction for me with infrared is how the filter renders foliage and grass. I wanted to extract as much sharpness of leaves as I could, so fast shutter speeds are essential. Therefore, the only option was to get my camera converted. I had an old Fujifilm X-E1 camera gathering dust so it was an obvious choice for a conversion job.

Selecting a camera conversion service

There are a few places around the world who convert cameras to infrared. I settled on LifePixel in the USA to do the job for me. I was only interested in black and white photography so I picked the 830nm filter. Sending from New Zealand is a bit of a mission, but LifePixel did a great job, and they even offer a free zoom tutorial to get you up and running. I skipped on the tutorial as making mistakes is the only way I learn, but I thought it was a nice bonus to the service.

My first week of infrared photography

Now I had my camera back it was time to start taking pictures and learn this medium. I figure the best plan of attack for sharing what I have learned so far is to critique my images.

Tunnel beach, Dunedin, NZ. With this image I like the cliffs and water, but the cloud above the cliff is blending too much into the white grass. A cleaner blue sky would have been more dynamic. Lesson 1: Watch what is happening in the sky.

Cabbage trees, Dunedin, NZ. This image is a great example of why you should get a camera converted to infrared as opposed to using an external filter. Cabbage tree leaves blow around even in a gentle breeze. If I had an external filter on my lens this plant would have been a blurry mess due to the exposure time needed. But, with a converted camera I was able to use a fast shutter speed to freeze the action of the leaves. Lesson 2: I really like a minimal look with infrared. A simple composition is easier for the eyes to decipher. Also, the sun was directly behind me on this image and it resulted in very deep tones on the ocean and sky.

The Turf, Dunedin, NZ. The ability to create contrasty black and white images has my head spinning, exploring lines and shapes as much as a subject. Lesson 3: Embrace the blacks and accentuate the whites.

Forsyth Barr Stadium, Dunedin, NZ. I really enjoy how the sunshine is creating pockets of white in this image on the grass, foliage and lichen. Lesson 4: Point the camera at everything, you just don’t know how it is going to look.

Centre Rd, Otago Peninsula, Dunedin, NZ. I like the horses grazing on farmland, but the sky in this image could have been epic if I had waited a little longer for the clouds to drift across. i feel the grass is a little flat as I didn’t have a solid foreground element. So all in all, not my best work but a good learning image. In the next photo I address this issue.

Highcliff Rd, viewpoint, Otago Peninsula, Dunedin, NZ. A big improvement from the image above, as I included a strong foreground element (the fence) leading to the trees. I noticed clouds drifting over the sun, so, I waited for the dappled light to create interesting shadows on the white grass before I took the shot. If I had taken the image without the cloud shadows the grass would have had no texture and contrast. Lesson 5: Clouds can be helpful in creating depth on ‘white’ foreground grass.

Henley-Berwick Road, Dunedin, NZ. This image took advantage of the morning fog cloaking the Maungatua range in the background. Lesson 6: Manmade objects often go dark in infrared, so make excellent leading lines as they dissect the ‘white’ infrared grass and foliage.

Henley Berwick Road stream, Dunedin NZ. I was nearly pointing the camera toward the sun in this image. I’m not sure if that was a good move, but I managed to extract plenty of contrast in post. I am yet to figure out if the histogram in the camera is of any help, or if I am best to eyeball exposure through the viewfinder. This is an evolving tip, but I am leaning toward exposing to what I see in the viewfinder.

Hut at Waipori water station, Dunedin, NZ. Here the infrared effect is very obvious, but the more I look at this, the more it looks like a hoar frost in winter.

Picnic table at Lake Waihola, Dunedin, NZ This image is really surreal, the almost glowing white willow foliage is nuts. Lesson 7: I got low here to try and separate the white foliage of the willow branches with the dark sky. Overall this image shows excellent separation of elements via black and white tones.

Titri creek track, Lake Waihola. I’m so glad I got my camera converted, just so i can take loads of pictures of cabbage trees. I love them, they look like something out of a Dr Suess illustration. Tip 8: Embrace the surreal.

Henley Co-Operative Chees Factory, Dunedin, NZ. Not all infrared images need to scream I am infrared. In this shot the infrared luminescence of the foliage helped sculpt out highlights around the central subject of the cheese factory bathed in sunlight. Lesson 9: Embrace subtlety as well as surreal.

A week of learning

I have to say my first week of Infrared photography was a real joy. I feel like I am gathering plenty of experience to help refine my approach to the genre. When the next sunny day happens in Dunedin, I will be out taking images. If you would like to see more of my infrared work in future, I have started a Vero account @trevhill. The platforms dark display layout is perfect for black and white photography. I look forward to catching up with you there.