Infrared photography - Creating a body of work.

When I started out with infrared photography a few months ago I had no idea where my journey would take me. Initially I though infrared would be about capturing landscape, but that changed when I started photographing the buildings and manmade elements of Dunedin city.

The image that made me sit up and go ‘wow, I love how this looks’ was of the clock tower at Otago University. Heritage buildings render beautifully in infrared. There is almost a vintage and gothic vibe imparted by the glow of the foliage and grass in each scene. In Dunedin we have a nice selection of heritage buildings, so I intend to keep returning to them all, as I know each visit will give me a different result. I am not 100% happy with some of the images in the set below, but you can clearly see where I am heading with my infrared work. It will be great when a few key buildings are uncovered from scaffolding, hopefully they will have some extra pop for photos.

Otago University Clock Tower, Dunedin.

East Taieri Church, Mosgiel.

Otago Museum, Dunedin.

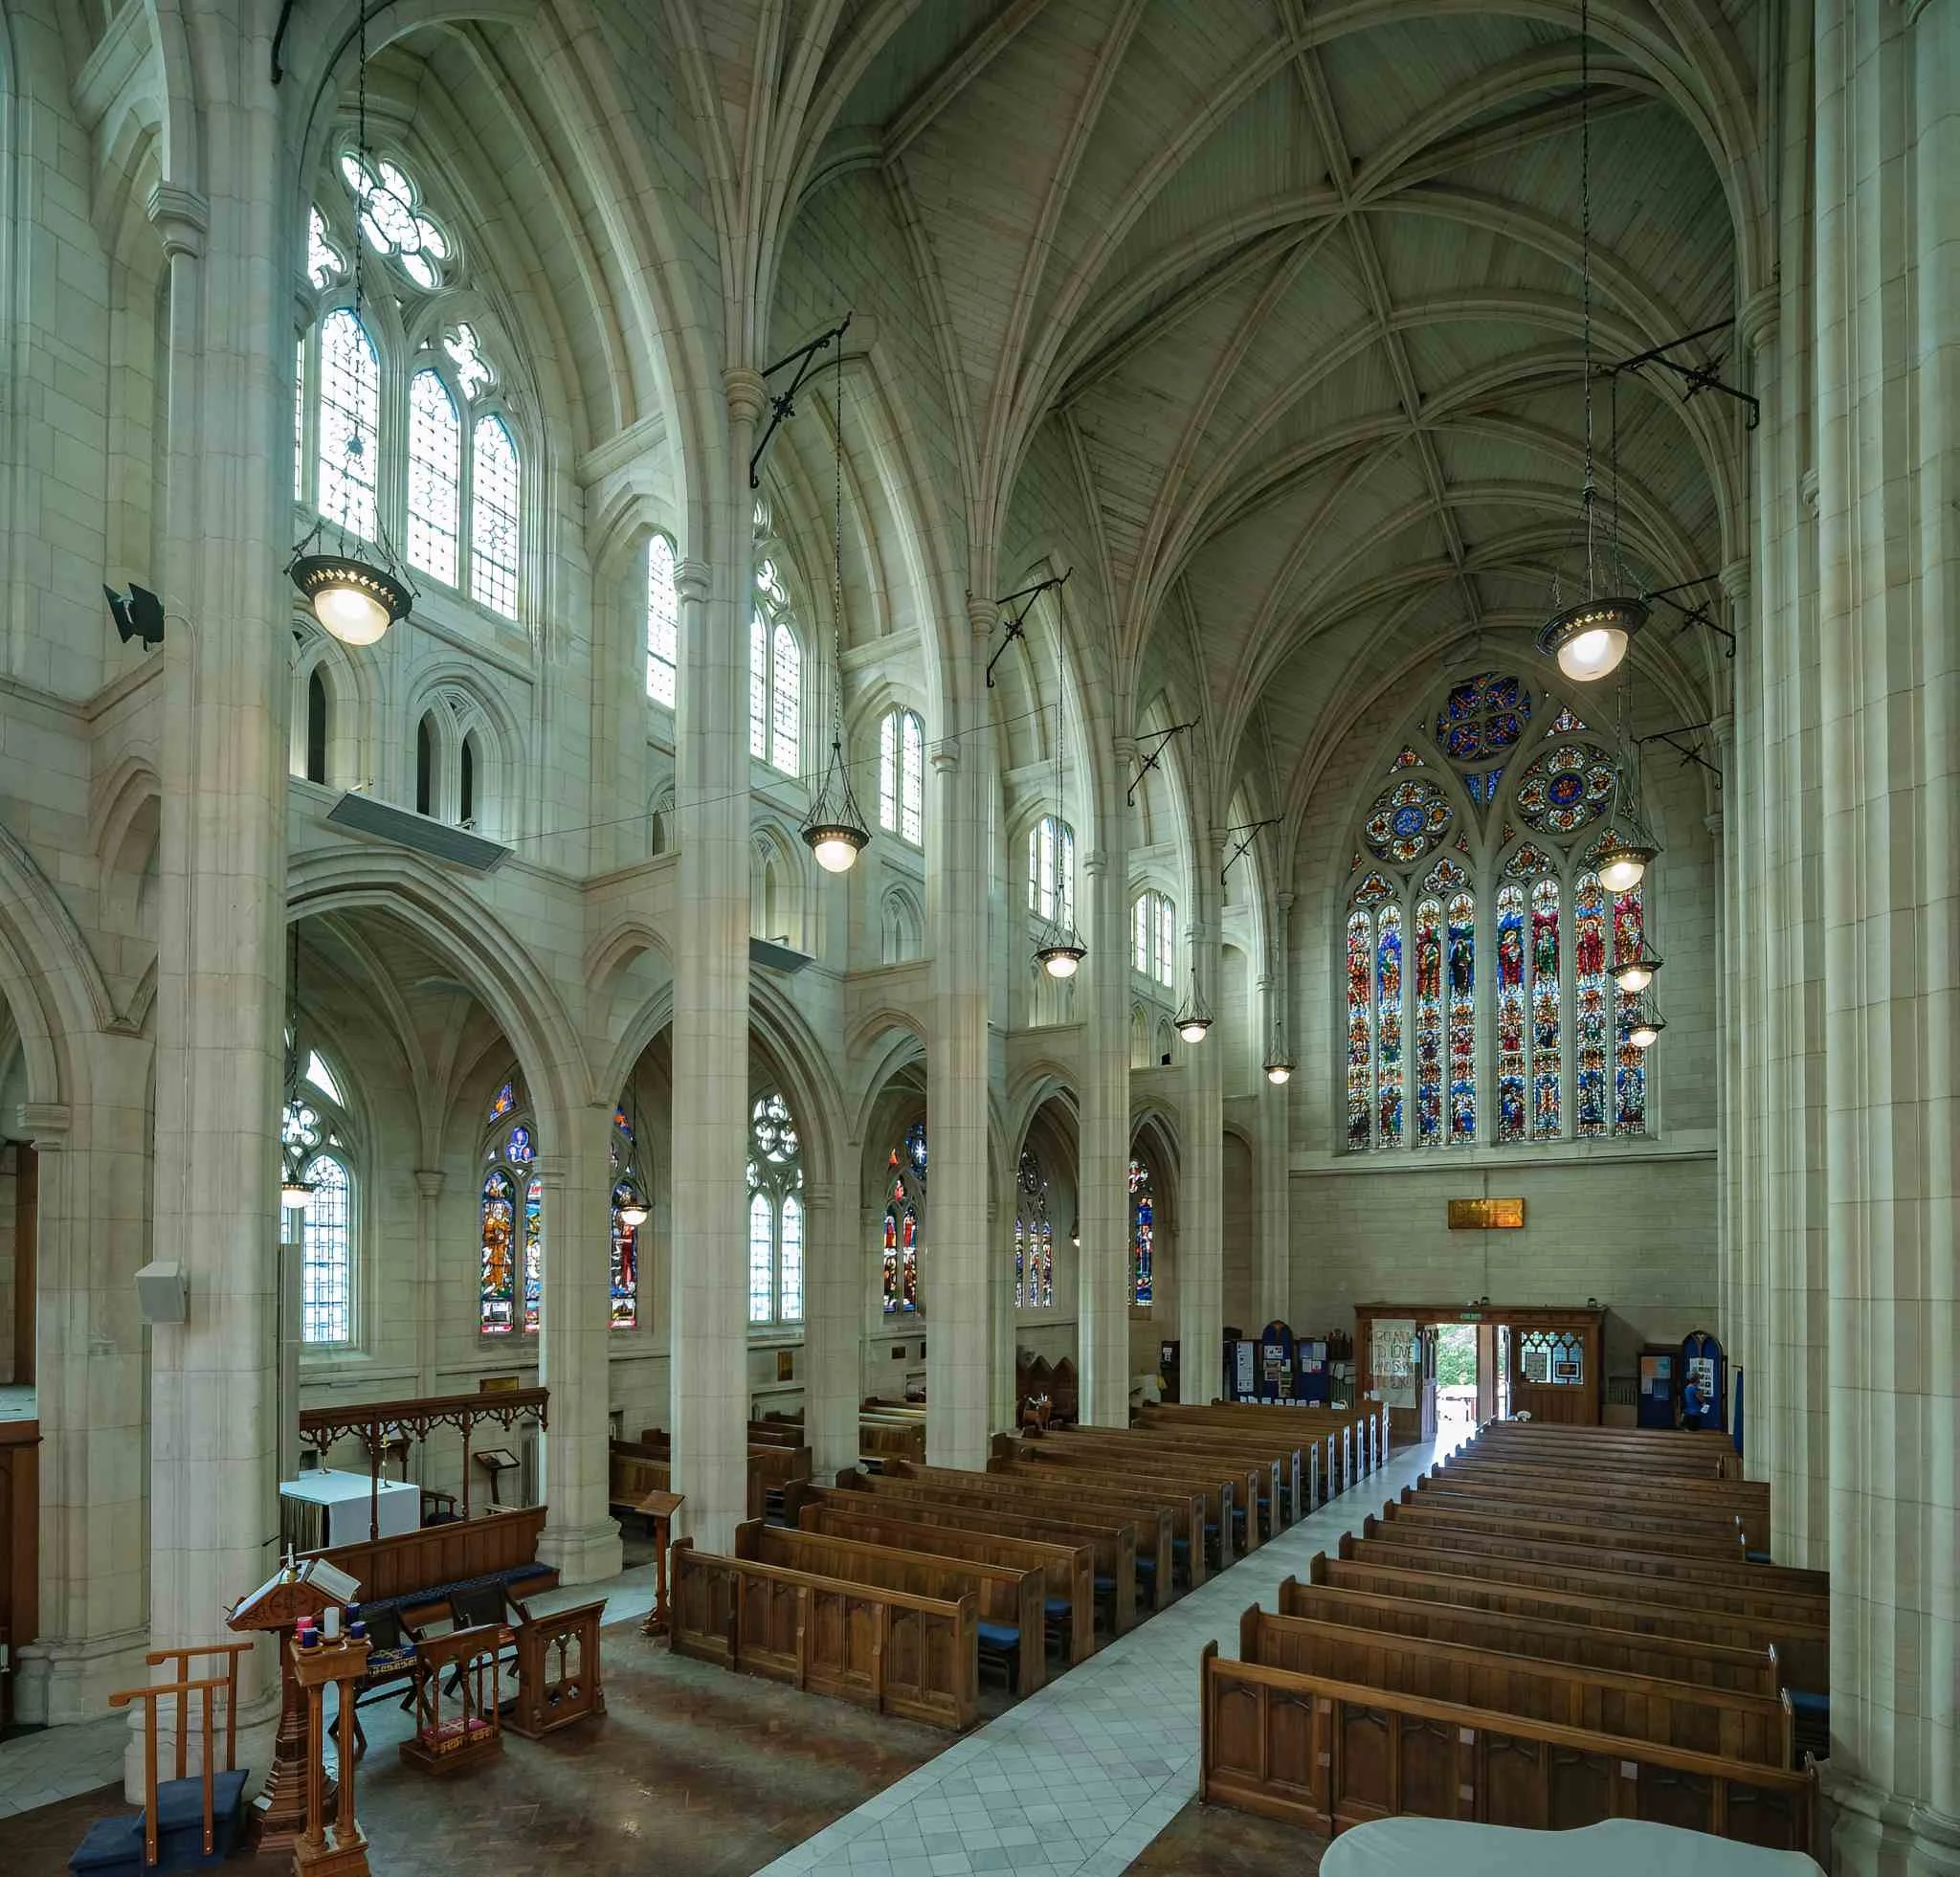
St Pauls Cathedral, The Octagon, Dunedin.

Lake Waihola, Dunedin. Early morning mist hangs over the lake.

Wingatui Railway Station, Dunedin. An image from a set I wrote another blog on.

St Joesephs Cathedral, Dunedin.

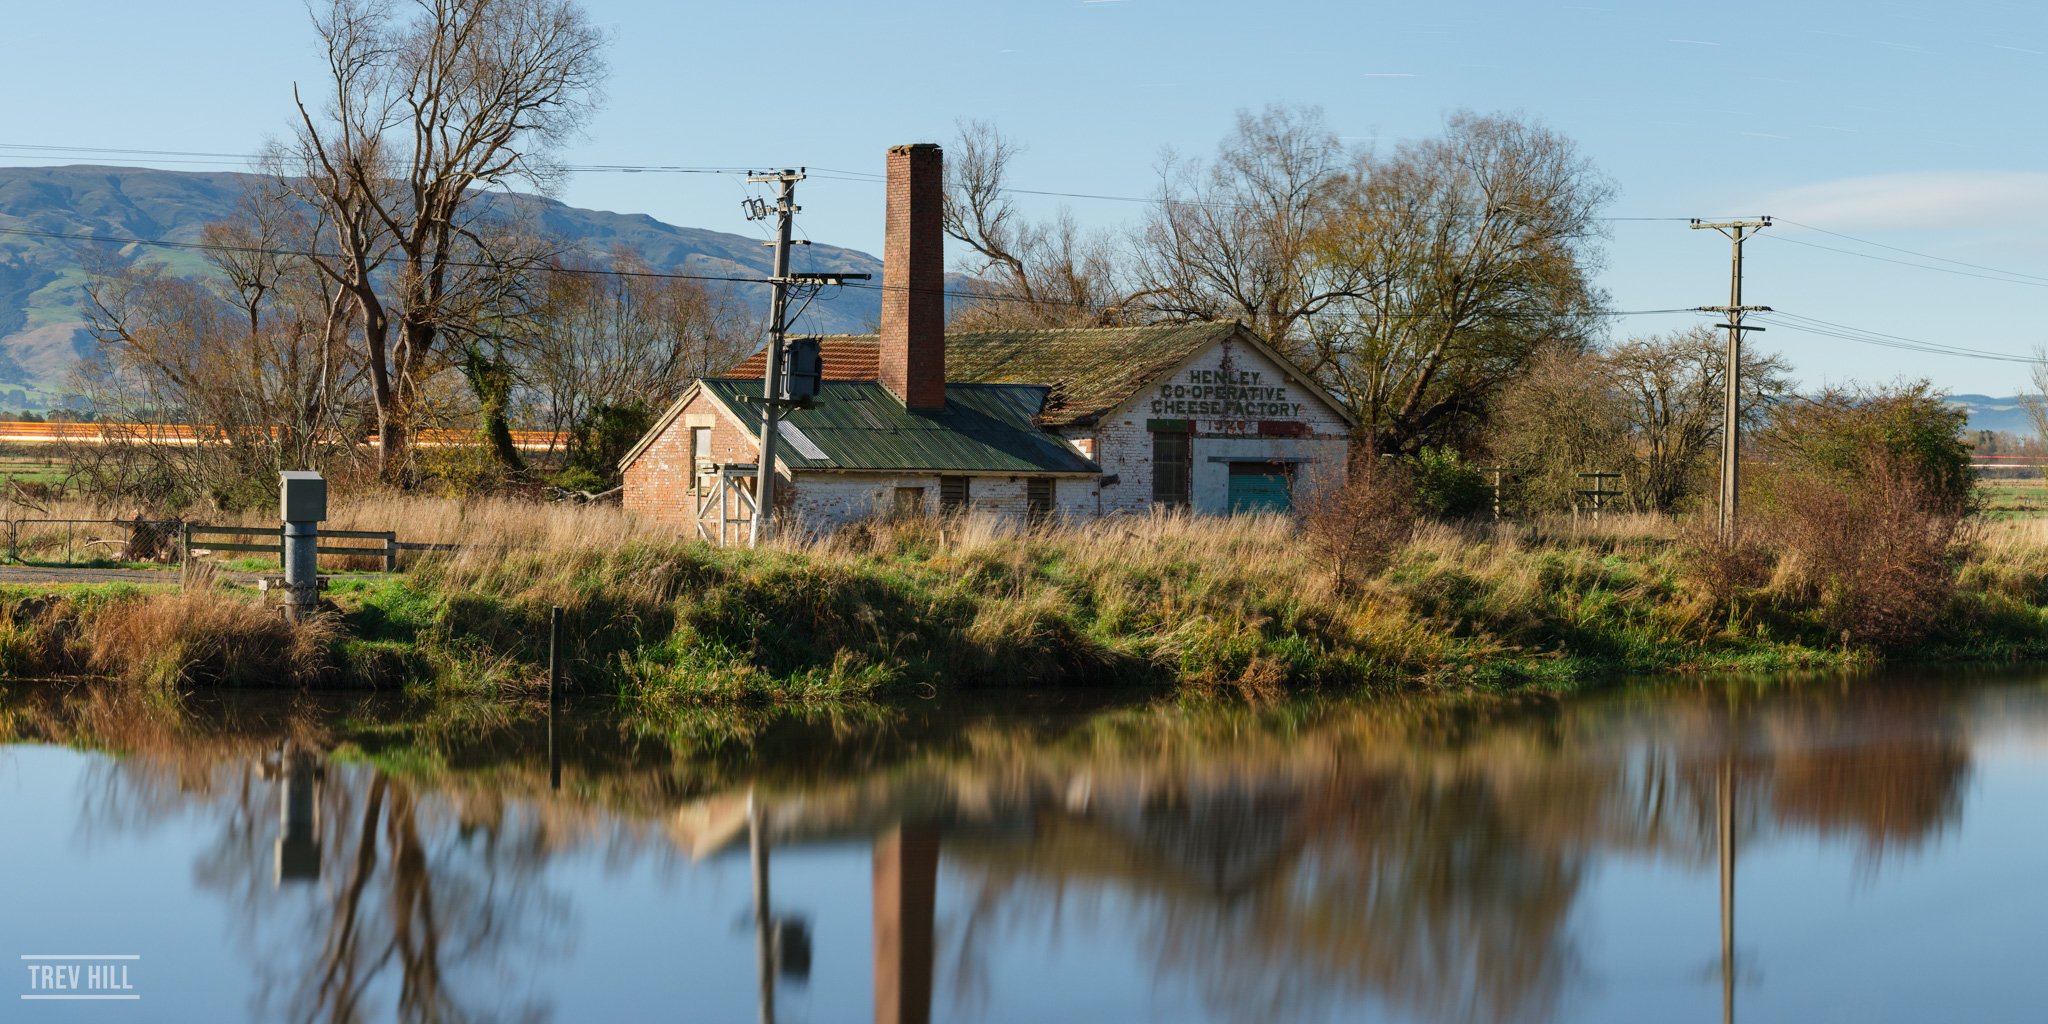
Historic Henley Cheese Factory, Dunedin.

The Oval, Dunedin.

Greenpoint Shipwreck Yard, Bluff.

Mausoleum of William Larnach, North Cemetery.

Lookout Point Fire Station, Dunedin.

Victorian Water House - Ross Creek Resevoir, Dunedin

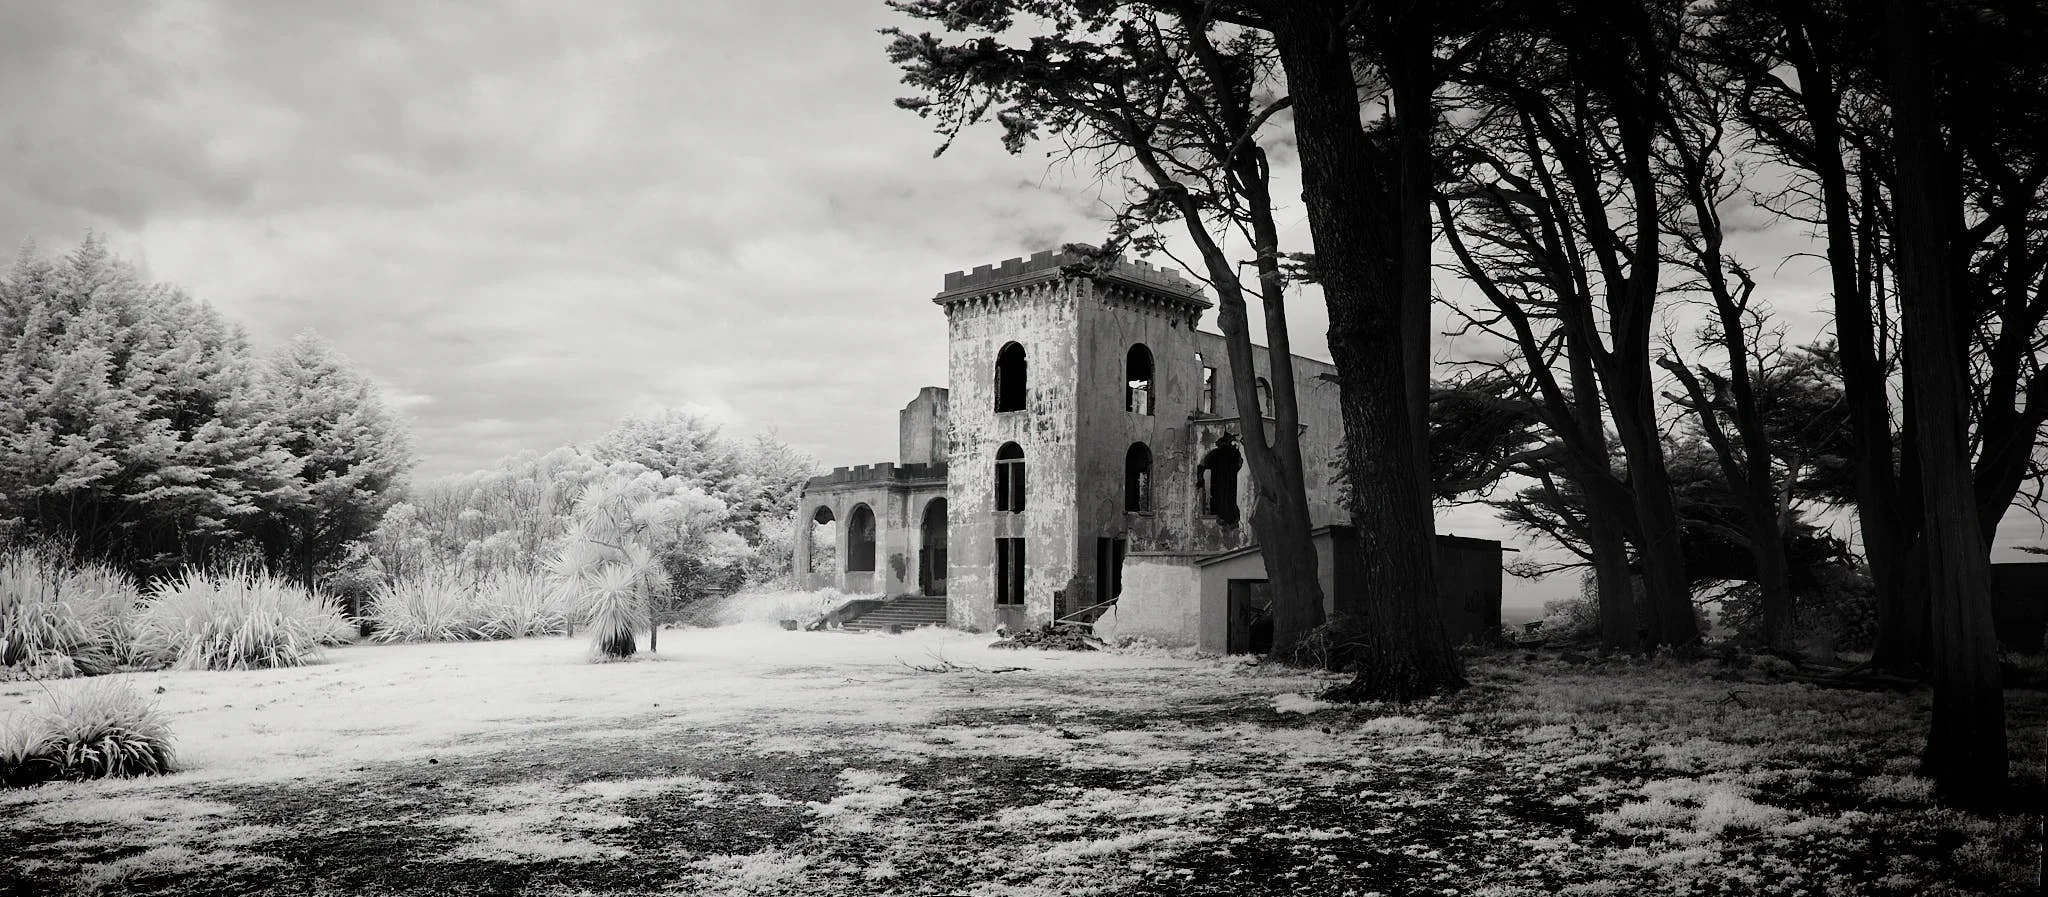
Cargill’s Castle, Dunedin.

First Church, Dunedin.

Second Beach - Stormwater outlet (1904), Dunedin.

Chingford Park, a closer view. I’m not completely happy with the framing but this shot has great potential, if I can get a windless day, and would also make a nice colour image in Autumn.

A closer view of Otago Boys High School.

Robbie Burns Statue, The Octagon, Dunedin.

Learning Infrared Black and White Photography

Introduction

I was watching Youtube a few months ago when I stumbled onto a vlog about black and white infrared photography. It was a revelation. Photography in full sunshine, in the middle of the day, with stunning results. It sounded like madness but the results I was seeing were stunning. After diving into a rabbit hole on the internet about infrared, I started to think about how infrared would benefit my photography.

  1. Hiking during the day in harsh light isn’t usually an opportunity for photography, now with infrared those conditions are perfect. My quest to document New Zealand’s stunning great walks could be enhanced by bringing both a normal and infrared camera body on trips, carrying one set of lenses for both.

  2. Black and white photography is a non-event in my landscape portfolio and shop. Documenting images in mono could bring a new customer to my online store. www.trevhillshop.nz

  3. Reshooting my favourite honeypot spots around Otago completely reinvigorates my landscape photography.

  4. Getting outdoors in summer is healthy and good exercise for the mind and body.

Camera Conversion or buy a filter?

The quick and fast solution to starting in infrared photography is to buy a simple screw on filter for the front of your lens. The big disadvantage you have with this method is the filter acts like a 10 stop ND and long exposures are needed to get a decent exposure. The main attraction for me with infrared is how the filter renders foliage and grass. I wanted to extract as much sharpness of leaves as I could, so fast shutter speeds are essential. Therefore, the only option was to get my camera converted. I had an old Fujifilm X-E1 camera gathering dust so it was an obvious choice for a conversion job.

Selecting a camera conversion service

There are a few places around the world who convert cameras to infrared. I settled on LifePixel in the USA to do the job for me. I was only interested in black and white photography so I picked the 830nm filter. Sending from New Zealand is a bit of a mission, but LifePixel did a great job, and they even offer a free zoom tutorial to get you up and running. I skipped on the tutorial as making mistakes is the only way I learn, but I thought it was a nice bonus to the service.

My first week of infrared photography

Now I had my camera back it was time to start taking pictures and learn this medium. I figure the best plan of attack for sharing what I have learned so far is to critique my images.

Tunnel beach, Dunedin, NZ. With this image I like the cliffs and water, but the cloud above the cliff is blending too much into the white grass. A cleaner blue sky would have been more dynamic. Lesson 1: Watch what is happening in the sky.

Cabbage trees, Dunedin, NZ. This image is a great example of why you should get a camera converted to infrared as opposed to using an external filter. Cabbage tree leaves blow around even in a gentle breeze. If I had an external filter on my lens this plant would have been a blurry mess due to the exposure time needed. But, with a converted camera I was able to use a fast shutter speed to freeze the action of the leaves. Lesson 2: I really like a minimal look with infrared. A simple composition is easier for the eyes to decipher. Also, the sun was directly behind me on this image and it resulted in very deep tones on the ocean and sky.

The Turf, Dunedin, NZ. The ability to create contrasty black and white images has my head spinning, exploring lines and shapes as much as a subject. Lesson 3: Embrace the blacks and accentuate the whites.

Forsyth Barr Stadium, Dunedin, NZ. I really enjoy how the sunshine is creating pockets of white in this image on the grass, foliage and lichen. Lesson 4: Point the camera at everything, you just don’t know how it is going to look.

Centre Rd, Otago Peninsula, Dunedin, NZ. I like the horses grazing on farmland, but the sky in this image could have been epic if I had waited a little longer for the clouds to drift across. i feel the grass is a little flat as I didn’t have a solid foreground element. So all in all, not my best work but a good learning image. In the next photo I address this issue.

Highcliff Rd, viewpoint, Otago Peninsula, Dunedin, NZ. A big improvement from the image above, as I included a strong foreground element (the fence) leading to the trees. I noticed clouds drifting over the sun, so, I waited for the dappled light to create interesting shadows on the white grass before I took the shot. If I had taken the image without the cloud shadows the grass would have had no texture and contrast. Lesson 5: Clouds can be helpful in creating depth on ‘white’ foreground grass.

Henley-Berwick Road, Dunedin, NZ. This image took advantage of the morning fog cloaking the Maungatua range in the background. Lesson 6: Manmade objects often go dark in infrared, so make excellent leading lines as they dissect the ‘white’ infrared grass and foliage.

Henley Berwick Road stream, Dunedin NZ. I was nearly pointing the camera toward the sun in this image. I’m not sure if that was a good move, but I managed to extract plenty of contrast in post. I am yet to figure out if the histogram in the camera is of any help, or if I am best to eyeball exposure through the viewfinder. This is an evolving tip, but I am leaning toward exposing to what I see in the viewfinder.

Hut at Waipori water station, Dunedin, NZ. Here the infrared effect is very obvious, but the more I look at this, the more it looks like a hoar frost in winter.

Picnic table at Lake Waihola, Dunedin, NZ This image is really surreal, the almost glowing white willow foliage is nuts. Lesson 7: I got low here to try and separate the white foliage of the willow branches with the dark sky. Overall this image shows excellent separation of elements via black and white tones.

Titri creek track, Lake Waihola. I’m so glad I got my camera converted, just so i can take loads of pictures of cabbage trees. I love them, they look like something out of a Dr Suess illustration. Tip 8: Embrace the surreal.

Henley Co-Operative Chees Factory, Dunedin, NZ. Not all infrared images need to scream I am infrared. In this shot the infrared luminescence of the foliage helped sculpt out highlights around the central subject of the cheese factory bathed in sunlight. Lesson 9: Embrace subtlety as well as surreal.

A week of learning

I have to say my first week of Infrared photography was a real joy. I feel like I am gathering plenty of experience to help refine my approach to the genre. When the next sunny day happens in Dunedin, I will be out taking images. If you would like to see more of my infrared work in future, I have started a Vero account @trevhill. The platforms dark display layout is perfect for black and white photography. I look forward to catching up with you there.

Photoshoot: Dunedin city in leather.

In this fashion themed photoshoot, I explore the back alleys of Dunedin city with model Amy in her black biker leathers.

Gear Used: Fujifilm XH1, XF23mm F2, XF56mm 1.2, Godox AD200pro.

I really loved the iron work over the windows so we went wide here with the XF23mm f2 at f5.6 to create some scale and impact. Great pose from Amy.

Placing Amy on the ledge provided an opportunity to create a leading line with the stairwell. Here I used the XF56mm @ f5.6 The sunlight is coming from the right of the camera. I am simply using the Godox AD200pro to create fill on Amy’s face.

The light is skimming across the face of the colourful wall and washing over Amy. XF23mm f2 @f5.6. One of the hardest things about modelling is posing but making it look natural at the same time. Amy really pulls off a candid moment.

Amy pulls off a Matrix vibe here standing underneath the dripping paint from some street art. XF56mm 1.2 @ f5.6. I placed the light opposite her in this shot so it creates a natural vignette around her.

My favourite image from the set with the sun creating highlights on Amy’s hair, leather jacket and pants. The Godox Ad200pro provides the fill so we can see Amy’s face as well as C3PO and R2D2. XF56mm 1.2 @ f5.6.

Another fun photoshoot in the colourful and interesting back streets of Dunedin city. A massive thank you to Amy for rocking the biker leathers and shades.

Photoshoot: Street Fashion

Here is the latest blog in my series on street fashion photography. Dunedin has some very interesting back alleyways, making for fantastic fashion shoot locations. All of the images were taken within 30 metres of each other. Technically, I used a single Godox AD200 pro in conjunction with sunlight.

We incorporated the pink paint on the brick wall with Rachel’s tracksuit top.

An old stairwell provided a strong graphic element to the shot.

Seated and framed.

I loved this teal coloured door, and will definitely use it again.

I loved this teal coloured door, and will definitely use it again.

A single Godox AD200pro provides the light in this scene.

Going vertical.

A closer look.

Colourful street art pops off the wall against the pink of Rachel’s track suit top.

I am using a single Godox AD200pro to light Rachel from the front, the sun is rim lighting her hair. The wind was just doing its thing!

Another fun shoot with Rachel. Dunedin is a wonderful city, and I look forward to sharing new locations to shoot fashion street imagery.